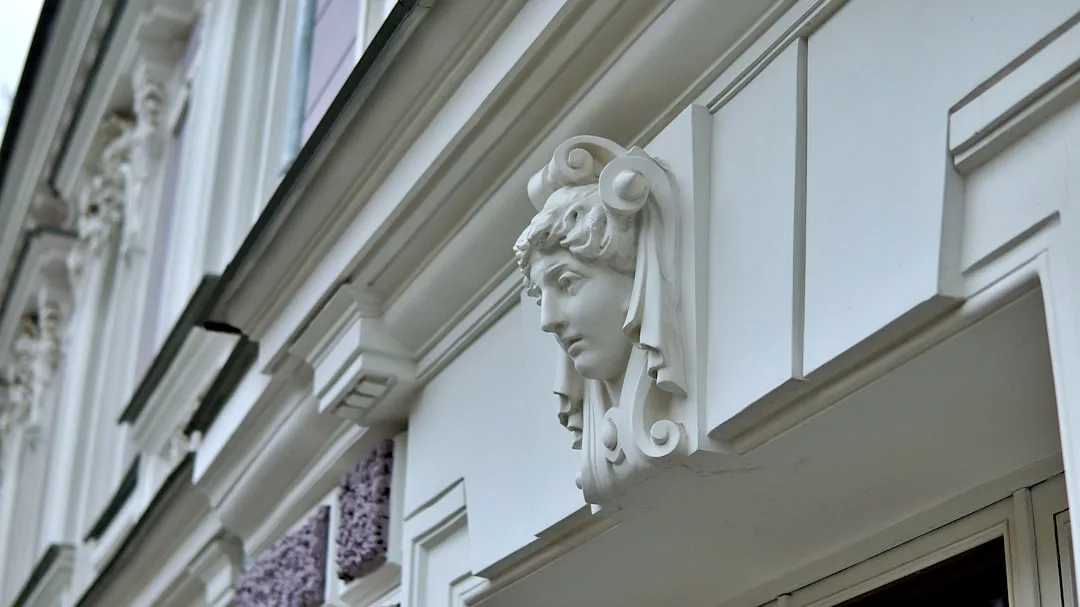
The Cornice Is Not Decoration — It Is Structure for the Eye
A facade cornice serves a specific visual function: it terminates the wall plane and creates a shadow line that gives the building a defined top edge. Without it, a rendered facade reads as unfinished — the wall simply stops, with no hierarchy between the body of the house and the roofline. That optical flatness is the most common reason renovated homes look generic despite expensive materials.
Classical architecture codified this centuries ago. The cornice was the crowning element of every serious building, from Greek temples to Georgian townhouses. When 20th-century construction stripped it out to cut costs, it removed the one detail that signaled architectural intent. Adding it back — even in EPS — immediately restores that signal.
Why EPS Is the Practical Choice in 2026
Expanded polystyrene has a density of 15–25 kg/m³ in facade-grade profiles, which means a 3-meter cornice section weighs under 1.5 kg. That matters for both installation speed and structural loading on insulated wall systems. Compare that to GRC at 35–50 kg for the same length, and the logistics difference is obvious.
EPS also has a lambda value around 0.036 W/mK, so it contributes marginally to the thermal envelope rather than creating a cold bridge, unlike metal or concrete alternatives. On ETICS systems — where every junction is a potential thermal weak point — this is a genuine technical advantage. The material is fully compatible with mineral and synthetic renders used by Baumit, Weber, and Caparol.
Cost is the third argument. Exterior cornices in EPS run $8–$22 per linear meter for standard profiles, installed. The equivalent GRC profile costs $120–$180/lm before labor. For a typical semi-detached house with 30 linear meters of cornice, the EPS option saves $3,000–$5,000 on material alone.
Profile Selection: What Actually Works at Street Scale
The most common mistake is choosing a profile that looks substantial in a catalog photo but disappears on the actual building. At 10 meters viewing distance, a cornice needs a minimum 100mm projection to create a visible shadow line. For two-story homes, 150–200mm projection with a total height of 200–280mm is the functional range.
Classical profiles — cyma recta, ovolo, cavetto — are not aesthetic choices but proven shadow-casting geometries. Each curve was developed to catch light at specific sun angles. A flat-banded cornice works on modernist facades but requires greater projection to compensate for the absence of curved shadow detail. Choose profile complexity based on architectural style, not personal preference.
Comparison: EPS vs. Alternative Cornice Materials
| Material | Cost ($/lm installed) | Weight (kg/lm) | ETICS Compatible |
|---|---|---|---|
| EPS Polystyrene | $8–$22 | 0.3–0.6 | Yes — no structural modification |
| GRC (Glass fiber reinforced concrete) | $120–$180 | 12–18 | Requires bracket support |
| Natural Stone | $300–$600 | 60–120 | No — requires structural ledge |
| Polyurethane (PU foam) | $25–$45 | 0.8–1.2 | Yes — but less UV stable than EPS+render |
| Fiber Cement | $55–$90 | 8–14 | Partial — requires mechanical fixing into substrate |
Installation: The Steps That Determine 25-Year Performance
Cut cornice sections to length with a fine-tooth handsaw or hot wire cutter. Miter external corners at 45° using a compound miter saw — do not attempt to join corners with filler, as thermal movement will crack the joint within two seasons. Apply a full-coverage layer of polymer adhesive (Baumit StarContact or equivalent) to the back face, then press firmly onto the prepared substrate.
Mechanical fixing is non-negotiable for projecting profiles. Drive 6mm stainless steel screws every 300mm along the top and bottom edge, countersinking the head 5mm. Cover screw heads with adhesive before applying the basecoat. The basecoat — minimum 3mm of polymer-modified mortar with embedded alkali-resistant mesh — is what gives the finished cornice its hardness and water resistance.
Finish with a silicone render or elastomeric paint in a color that contrasts or coordinates with the main wall. A cornice in a slightly lighter shade than the wall — Delta E 5–10 — creates shadow definition without visual clash. Avoid white on dark facades unless the projection is over 180mm, as the color contrast will dominate the shadow line.
Integrating the Cornice With Other Facade Elements
A cornice works hardest when it sits within a system of horizontal and vertical elements. Pairing it with exterior foam moldings at window head level — a continuous band or individual lintels — creates a visual grid that organizes the facade. Without that secondary horizontal, the cornice reads as an isolated addition rather than part of an intentional composition.
Vertical elements like pilasters or quoin corners reinforce the system further, giving the cornice something to land on at the building’s edges. The rule is simple: a cornice terminating at a plain corner looks unresolved; a cornice meeting a quoin or pilaster looks deliberate. Budget an additional $15–$40/lm for corner treatments, and factor them into the design before ordering profiles.
The total investment for a complete cornice installation on a 120m² semi-detached house — including corner treatments and window-level bands — typically runs $1,800–$3,500 in materials, plus $1,200–$2,000 in labor. That is the cost of one mediocre front door, and it changes the entire street presence of the building permanently.