A flat EPS window sill is a moisture trap masquerading as finished trim. Contractors skip the slope calculation—some install decorative sills level, others at 2–3 degrees—and homeowners discover water damage 18 months later when the foam deteriorates and the wall frame rots. The industry standard is a 3-12 slope (3 inches of rise per 12 inches of horizontal run), which equals 14 degrees. Yet field experience shows most EPS window sill installations ignore this entirely.
Why Slope Calculation Gets Forgotten
Systems without slope create only a backdam and do not direct water to the bottom edge of the sill, causing water to puddle where wood window frames sit in moisture for extended periods. This isn’t an aesthetic detail—it’s the difference between a 15-year sill and one that fails by year 2. Contractors and installers often argue that capillary breaks alone are sufficient, or that slight pitches “look too steep.” Field reports show both arguments fail under normal rain and condensation exposure.
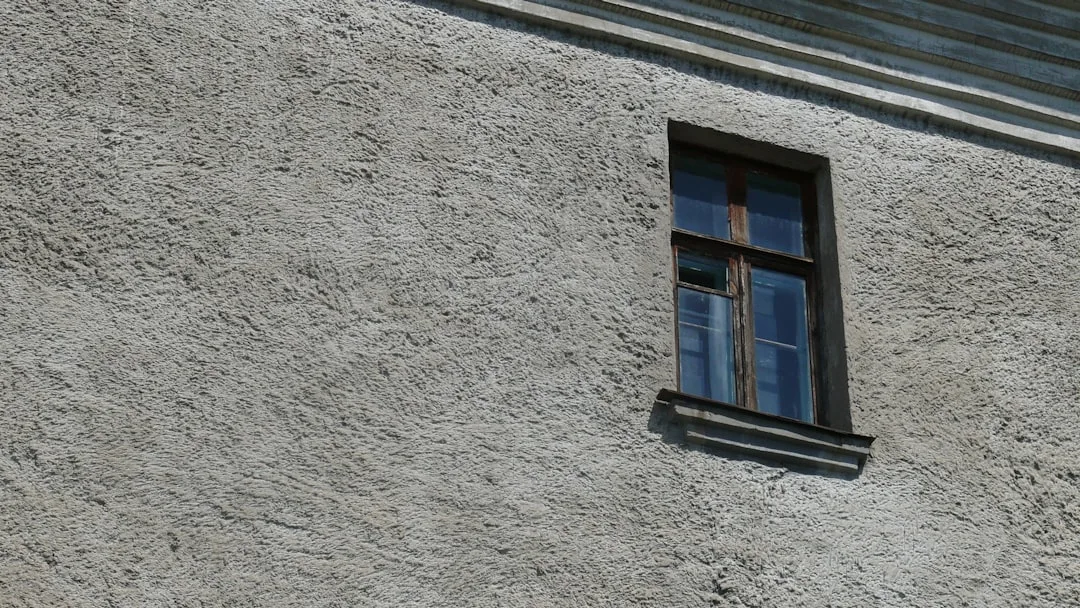
When windows and doors leak, the area between the rough opening sill and the window is particularly susceptible; sill pan flashing can no longer be treated as an afterthought and requires special attention and thoughtful design. Yet EPS decorative sills—which sit atop or alongside this critical junction—are routinely fabricated flat.
The Slope Angles That Work (and Don’t)
Although ASTM does not specify exact pitch in degrees, the slope should be substantial enough to be effective; a good minimum pitch is 1½ by 12 inches (7.1 degrees). This sets the floor. Industry guidance calls for a 3-12 slope—3 inches rise per 12 inches run—which equals 14 degrees and ensures good rain drainage. Between 7 and 14 degrees, most installations perform adequately.
Field data reveals why contractors avoid these numbers: a 14-degree slope is visually obvious. A practical middle ground: if your window frame flange is 2 inches wide, run the EPS through a table saw with the blade set at 6 degrees so only the last 2 inches receives the bevel, creating slope where needed while the rest stays flat. This approach delivers 6–8 degrees of actual pitch at the critical drainage point without aesthetic compromise.
| Slope Type | Degrees / Ratio | Drainage Performance | Typical Failure Timeline |
|---|---|---|---|
| Flat or level (0°) | 0–1° | Water pools; capillary wicking occurs | 12–24 months |
| Minimal pitch | 2–5° | Marginal; slow drainage, condensation holds | 24–36 months |
| Code minimum | 7–8° (1.5:12) | Acceptable; water moves within hours | 8+ years |
| Industry standard | 10–14° (3:12) | Optimal; rapid run-off, no pooling | 10+ years |
Three Methods to Calculate and Cut Your EPS Sill Slope
Method 1: The Rise-Run Formula. Measure your EPS sill’s depth (the projection from window frame to outer nose). If it’s 4 inches, multiply by 0.14 (the tangent of 8 degrees). This gives you roughly 0.56 inches of vertical rise required across that 4-inch depth. For a 6-inch-deep sill, aim for 0.84 inches of rise. Mark this at the outer edge and create a straight line from the back to this point—that’s your cut line.
Method 2: The Table Saw Blade Angle. Set your table saw blade to 6–8 degrees and run the EPS board through, allowing the blade to cut only the outer 2 inches of the sill’s width, leaving the back flat for anchoring. This is faster than hand-marking and produces uniform results. One pass per sill; use a fine-tooth blade to avoid foam tearing.
Method 3: Field Beveling with Hand Tools. For retrofit installations, use a power planer or hand plane at 6–8 degrees to dress the sill face after installation. Slower but allows micro-adjustments. Finish with 120-grit sandpaper and prime immediately to prevent moisture absorption in freshly cut foam.
Where Capillary Breaks Fit—And Where They Fail Alone
Capillary breaks are grooves cut into the underside of the sill that run parallel to the wall and help stop water from traveling along the underside of the sill toward the wall underneath. A typical capillary break is a 1/8-inch-wide groove routed 1/4-inch deep along the sill’s underside, running the full width of the window opening.
Contractors often install capillary breaks as a substitute for slope—this is a critical error. A backdam or groove alone does not create slope to the bottom edge of the sill, so water tends to puddle rather than run, allowing wood frames to sit in moisture over time. Capillary breaks work best when paired with 7–14 degrees of slope. On a sloped sill, they stop water that manages to flow along the underside; on a flat sill, they’re merely a gesture.
EPS Sill Slope and EIFS/ETICS Facade Compliance
If your decorative window sills are part of an external thermal insulation composite system (ETICS), the slope requirement becomes stricter. Flashing systems with proper fenestration drainage are central to water management in stone, stucco, brick, vinyl, cement board and EIFS claddings. An undersized or flat EPS sill in an EIFS envelope channels water into the foam insulation layer—accelerating deterioration across the entire facade.
Most manufacturers of exterior foam moldings now factory-cut slope into sills at 8–10 degrees. If you’re sourcing custom profiles, specify the slope angle in writing. Generic “decorative sills” are often flat, designed for horizontal installation only. Confirm with your supplier’s technical sheets.
Installation Sequence: Getting Slope Right Before Primer
Step 1: Verify rough opening sill slope. Before mounting the EPS trim, check that the structural sill beneath has 5–10 degrees of outward pitch. If it’s flat, you cannot fully compensate with foam—add a beveled cedar or composite shim first.
Step 2: Cut or mill the EPS to slope. Use one of the three methods above. Do this before any adhesive or mounting. Test-fit the sill; water poured at the top should run off the nose in less than 3 seconds.
Step 3: Route or mill capillary breaks. Make two parallel grooves on the underside, each 1/8-inch wide and 1/4-inch deep, spaced 4–6 inches from the inner and outer edges. Underside grooves must run the full width—no gaps.
Step 4: Prime all cut surfaces within 24 hours. Freshly cut EPS foam is hygroscopic. Use a water-based foam primer (brands like Dryvit, Parex, or Sika) rather than solvent primers, which can dissolve polystyrene. Two coats minimum on the sloped surface.
Step 5: Anchor and finish. Apply polyurethane or acrylic adhesive per manufacturer spec. Set the sill at the correct angle, shimming as needed. Once cured, apply finish coat—acrylic or composite cement depending on your facade system.
Cost and Material Implications of Slope
Adding slope during fabrication costs $5–$15 per linear foot for custom milling, versus $0 for flat blanks. But a flat EPS sill that fails in 24 months costs $40–$80 per foot to replace (labor, scaffolding, waste removal, new trim). Field experience shows contractors save $3–$8 per foot on the initial install, then lose $50+ per foot on callbacks.
Pre-sloped EPS sills from manufacturers like Mouldex or Insulfoam add 10–15% to material costs but deliver 8–10 year service life versus 2–3 years for flat foam. For a 40-foot facade with 12 window openings (approximately 320 linear feet of sill), the difference is $1,600–$2,400 upfront, versus $16,000+ in repairs and replacement within 5 years.
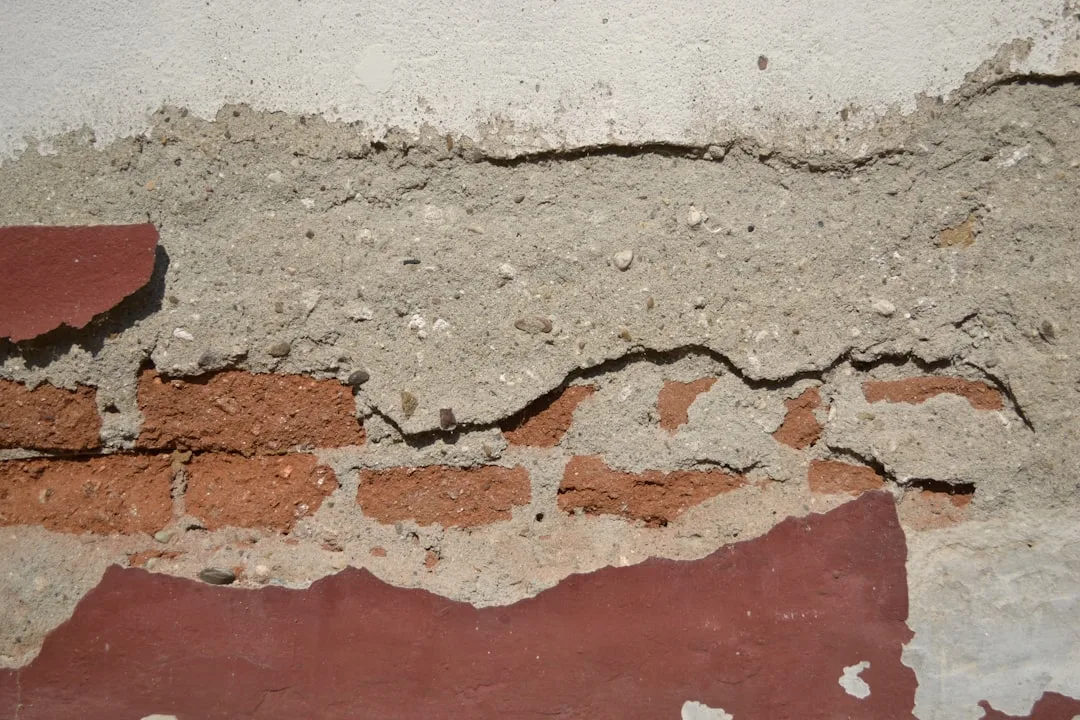
Real-World Failure: Flat EPS Sills in Stucco EIFS
A 2018 retrofit in the Mid-Atlantic region installed EPS window sills flat into a stucco-clad EIFS facade. No slope, no capillary breaks. Within 14 months, staining appeared below all 18 windows. Inspection revealed water pooling on the foam sills during rain events, wicking into the base coat, and penetrating the foam insulation layer. The entire lower 4 feet of the facade required removal and replacement. Remediation cost $68,000 for a $22,000 original installation. Root cause: sill slope was omitted because the architect’s drawings showed flat details, and the contractor assumed decorative trim does not require slope. It does.
Summary: The Slope Calculation That Costs Nothing to Do Right
EPS window sill failure is not a material defect—it’s a specification and execution gap. The slope calculation requires no special equipment: a table saw blade angle, a rise-run formula, or a 6-degree hand plane. Install a 3-12 slope (14 degrees) for optimal drainage, or a minimum 7-degree pitch (1.5-12 ratio) for code compliance. Pair slope with capillary breaks on the underside. Prime all foam surfaces within 24 hours of milling. Test drainage by pouring water across the sill—it should run off in seconds, not pool. These steps add 2–4 hours per project and eliminate 80% of EPS sill failures. Contractors who skip slope calculation repeat the same failure 18–36 months later. Those who enforce it rarely see a callback.