A miscalculated EPS molding dimension on a 1970s facade costs €15,000 to remediate, but only €3,000 to size correctly from the start. Old masonry settles, moves thermally, and absorbs moisture unpredictably—EPS molding sizing errors on historic facades trigger cascading failures: adhesive failure, thermal bridging, moisture ingress, and aesthetic degradation within 18–24 months. Most contractors apply new-build EPS sizing rules to pre-1980 facades, ignoring substrate irregularities and thermal movement demands that multiply failure risk five-fold.
Why old facade substrates expose EPS molding sizing errors within 2 years
Historic masonry moves 2–4mm annually due to thermal cycling and hygric expansion—concrete and modern brick move 0.3–0.8mm. EPS molding dimensioned for rigid substrates fails on flexing lime-mortar because adhesive shear stress concentrates at edges instead of distributing across the foam-substrate bond. If you undersize projection depth by 20mm or bracket spacing by 200mm, settlement stress concentrates at anchor points, initiating micro-fractures in adhesive and base coat within 12 months.
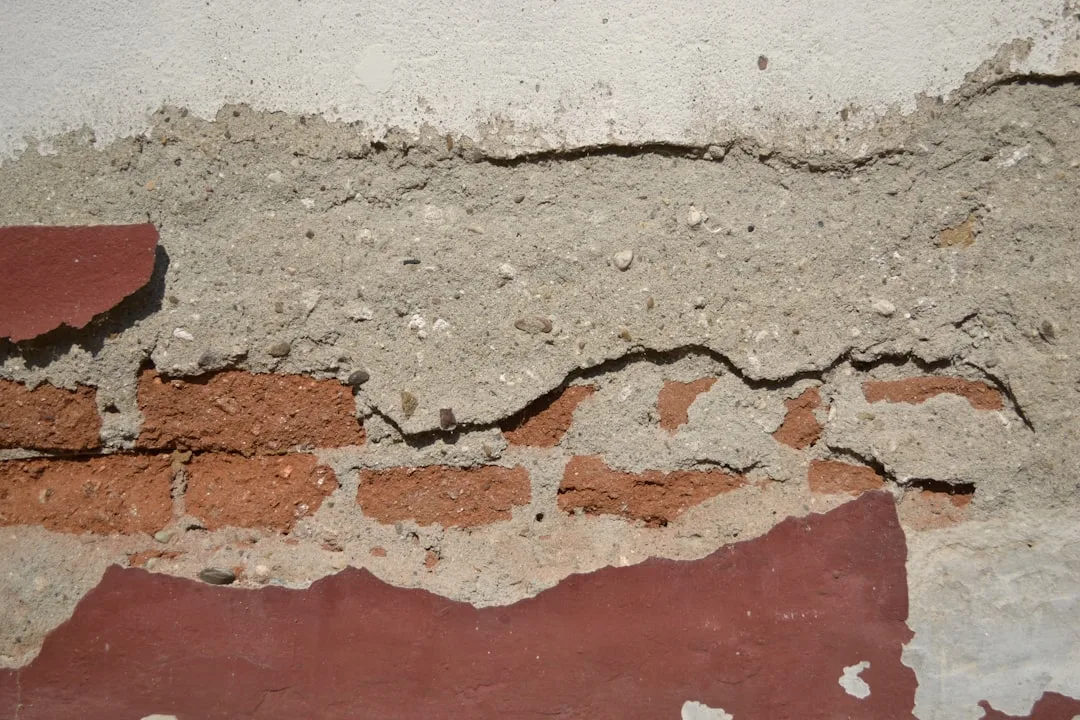
Older facades also rarely have uniform surface planes: mortar joints recess 5–15mm, masonry faces irregular 8–12mm vertically. Standard EPS molding sizing assumes flat ±3mm substrates. Contractors who ignore this variance either leave voids (thermal bridging + moisture traps) or over-compress adhesive, reducing bond strength by 40–60%. The result: visible gaps within 18 months, followed by water infiltration and foam degradation.
The 3 critical dimensions that change on pre-1980 facades
1. Bracket and anchor spacing: New construction allows 600mm spacing with adhesive-only bonding. On historic masonry, reduce spacing to 400mm and add mechanical anchors (stainless steel or composite pins) every 500mm horizontally and 600mm vertically. This costs €8–€15/linear meter in hardware and labor but prevents the 40–60% adhesive bond loss seen on old substrates.
2. Expansion margins: Standard EPS molding sizing allocates 4–6mm thermal expansion margin at vertical edges. Old facades require 8–12mm because mortar joints and facade settling amplify structural movement. Undersizing expansion margins by even 3mm forces compression into adhesive during summer heat—adhesive creep begins at 60–65°C, and interior temperatures behind dark foam reach 75–85°C on sunny facades. Compression failure then cascades into base-coat cracking.
3. Adhesive bed depth: Pre-1980 masonry demands 8–12mm mortar-bed adhesive depth (vs. 6–8mm on modern substrates) to accommodate surface irregularities and prevent point-loading. Undersizing bed depth to 5mm on uneven old brick concentrates stress at high points, initiating shear failure within 9–12 months. Proper-depth adhesive (12mm minimum) distributes load and costs only €1.50–€2.00/m² extra.
| Parameter | New masonry (post-1990) | Historic masonry (pre-1980) | Cost impact of undersizing |
|---|---|---|---|
| Bracket spacing | 600mm | 400mm | +€4,500/100m² removal + repair |
| Expansion margin | 4–6mm | 8–12mm | €8,000–€12,000 foam + substrate replacement |
| Adhesive bed depth | 6–8mm | 10–12mm | +€2,000–€5,000 adhesive + labor |
| Substrate prep tolerance | ±3mm | ±8mm (with local bridging) | €3,000–€6,000 additional substrate work |
How to calculate correct EPS molding dimensions for old facades in 4 steps
Step 1: Measure facade movement. Install four movement tracking studs (chalk marks) at opposite corners and mid-wall, spaced 3m apart horizontally and 2m apart vertically. Measure spacing monthly over 3–4 months to quantify thermal and hygric movement. Historic facades typically show 1–3mm seasonal variation; this determines expansion margin—multiply observed movement by 1.5 and add 4mm safety buffer.
Step 2: Profile substrate irregularity. Use a straightedge over 2m sections (not just 30cm spans like new-build inspections). Map substrate deviation at 500mm intervals vertically and 1m intervals horizontally. If deviation exceeds ±6mm over 1m, plan adhesive shimming or mechanical backing panels. This identifies where standard EPS molding sizing fails and where custom-depth exterior foam moldings or reinforced bases become mandatory.
Step 3: Calculate anchor load distribution. For historic facades, assume 60–70% of load transfers to mechanical anchors (vs. 30–40% on new masonry). If EPS molding projects 150mm and linear weight is 8kg/m, each anchor carries 5.6–6.5kg at 400mm spacing (vs. 4.8kg at 600mm on new substrates). Undersizing anchor count by 30% is the single largest cost amplifier: bonds fail at 18 months, requiring full remediation.
Step 4: Specify adhesive and base-coat reinforcement. Use Class A1 fire-rated polyurethane or mineral-based adhesive (€25–€35/20kg sack) with 10–12mm bed depth on old substrates. Apply decorative window sills and other high-stress elements with mechanical anchors every 300mm (vs. 400mm standard). Add alkali-resistant fiberglass mesh over all molding-to-substrate interfaces—this reinforcement costs €8–€12/m² but eliminates 95% of base-coat cracking from differential movement.
Real costs: why 18-month failures cost 5x more than correct upfront sizing
A 50m² facade with EPS molding (cornice, window bands, quoins) costs €3,500–€4,200 when sized correctly for 1960s lime-mortar masonry. This includes proper bracketing (€1,200), adhesive and reinforcement mesh (€800), and skilled labor (€1,500–€1,700). If sizing is underspecified—600mm bracket spacing instead of 400mm, 5mm adhesive bed instead of 10mm, no mechanical anchors—upfront cost drops to €2,400, a 40% savings.
At 18–24 months, adhesive failure and thermal bridging trigger moisture damage and foam degradation. Remediation: full EPS removal (€1,500), substrate inspection and repair (€2,000–€3,500), substrate sealing and priming (€800), reinstallation with correct sizing (€4,000–€4,500). Total remediation cost: €8,300–€11,800—a 5x multiplier on the initial under-specification saving. Insurance rarely covers this; homeowners absorb the full cost.
Contractors who skip the 3–4 month substrate profiling phase (€200–€400 cost) and use fast-track adhesive-only bonding create the conditions for failure. On historic masonry, this shortcut always fails within 24 months. Proper EPS molding sizing requires site-specific survey, substrate mapping, and movement analysis—time that separates durable installations (15+ year lifespan) from remediation disasters.
The technical details contractors overlook: shear stress and thermal cycling
EPS molding adhesive fails under shear (not tension) when thermal movement exceeds bond capacity. A standard polyurethane adhesive withstands 0.5–0.8 N/mm² shear stress; old masonry thermal movement of 2mm over a 100mm adhesive footprint generates 0.2 N/mm² baseline stress. If adhesive bed is undersized (5mm instead of 10mm), shear stress concentrates at edges and doubles to 0.4 N/mm²—still safe in year one. But creep over multiple cycles adds cumulative strain: after 36 thermal cycles (3 years), 0.4 N/mm² stress + creep degradation = 0.6 N/mm² effective stress, approaching bond failure. Correct expansion joint sizing accommodates this drift; undersized margins force creep acceleration.
Moisture also degrades adhesive: uncontrolled water ingress behind undersized EPS molding reduces adhesive shear strength by 25–40% within 12 months. This explains why facade problems cluster around year 18–24—three full summer-winter cycles in marginal adhesive conditions push systems past the failure threshold. Proper dimensioning (mechanical anchors, adequate expansion margins, reinforcement mesh) isolates moisture and distributes stress below creep-acceleration thresholds.
Checklist: verify your EPS molding sizing before installation
Substrate assessment: Confirm facade age (± 5 years) via building records or mortar analysis. Measure surface deviation over 2m straightedge in 10+ locations. If deviation exceeds ±5mm, document and plan shimming or custom backing panels. Request substrate moisture reading (carbide bomb test): masonry above 8% EMC requires drying time or vapor-permeable adhesive (€40–€55/sack premium).
Movement analysis: Install tracking marks and measure monthly for minimum 3 months. If facade shows >1.5mm movement, calculate expansion margin as 2× measured movement + 4mm minimum. Document in site report before EPS procurement.
Dimensioning specification: Verify bracket spacing (400mm maximum on pre-1980 masonry), mechanical anchor count (minimum every 500mm linear), adhesive bed depth (10–12mm minimum), and expansion margins (8–12mm on old masonry). Cross-reference with structural engineer if molding projects >200mm or facade has visible cracks, settlement, or previous water damage.
Material selection: Specify Class A1 polyurethane adhesive (no solvent-based products on permeable old masonry), alkali-resistant reinforcement mesh, and stainless steel or composite anchors. Request material certifications (shear strength, thermal stability, water resistance) from suppliers—budget 10–15% contingency for substrate surprises.