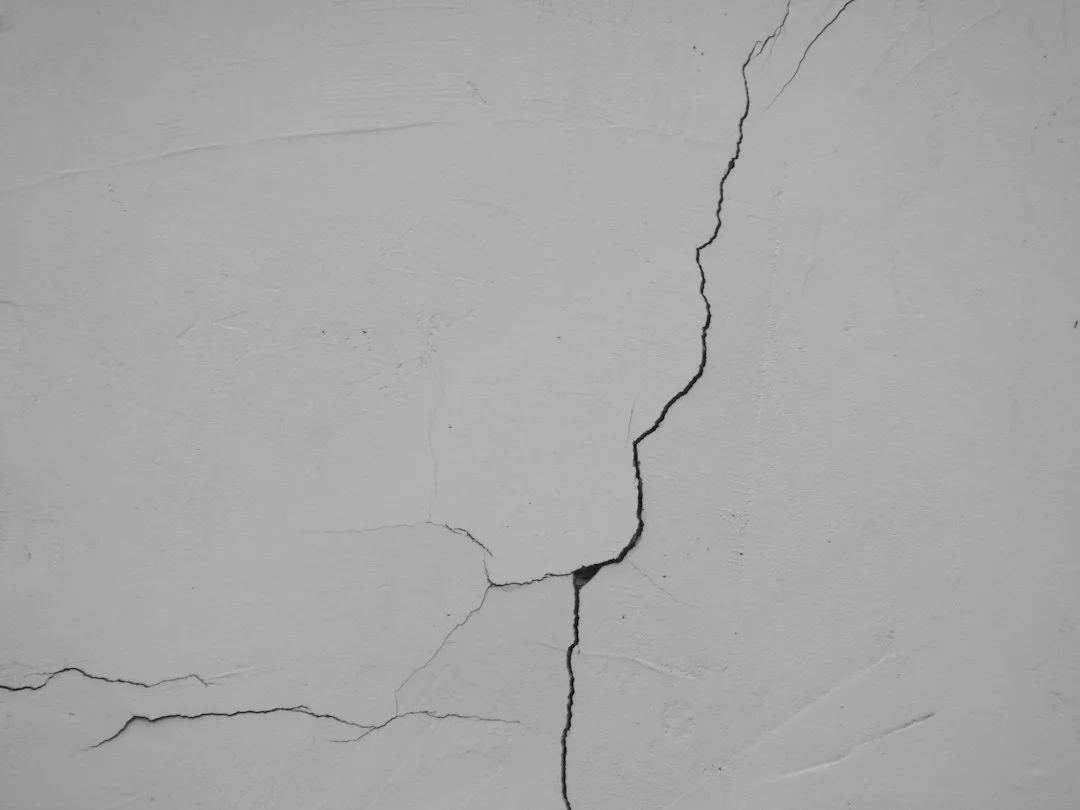
X-shaped cracks appear on EPS moldings with striking predictability around month 18, and field experience shows this is not a material defect—it is thermal stress concentrated at weak points where the substrate and foam move at different rates. Contractors rarely calculate thermal expansion of the base structure, so anchors and adhesives are installed as if the wall were static. When winter and summer temperature swings push the underlying masonry or concrete, the rigid foam resists movement until stress exceeds adhesive strength, and fractures propagate in diagonal stress lines that intersect to form an X. This damage is entirely preventable, but requires rethinking how moldings are fastened to moving substrates.
Why Thermal Cycling Causes X-Cracks in 18 Months
EPS polystyrene expands and contracts at roughly 0.05mm per meter per degree Celsius—far less than brick, concrete, or metal studs. A concrete block wall can expand 0.8 to 1.2mm per meter annually as it cycles through seasonal temperature extremes, while foam expands only 0.15mm per meter in the same range. Over a 3-meter-wide molding run, this creates 2–3mm of differential movement annually between substrate and foam.
For the first 12–15 months, this movement is absorbed by adhesive flex and compression of the insulation layer behind the molding. But around month 18, the adhesive reaches its elastic limit—it no longer stretches without tearing—and the concentrated stress shifts to geometric weak points. Corners, intersections, and edges of moldings become fracture initiation points because stress lines converge there. The fracture then propagates in two diagonal directions, forming the characteristic X.
Field observation shows this pattern is most severe on concrete block or fiber cement substrates, and less common on solid brick. Research into EPS load calculations reveals how installers underestimate substrate weight by 40 percent, which compounds the problem—heavier substrate means more extreme temperature-driven movement, yet anchoring is not adjusted accordingly.
| Substrate Material | Annual Expansion (mm per meter) | EPS Adhesive Bond Stress | Crack Timeline | Risk Level |
|---|---|---|---|---|
| Brick/masonry | 0.4–0.6 | Moderate | 24+ months | Low |
| Concrete block | 0.8–1.2 | High | 12–18 months | High |
| Metal stud framing | 1.8–2.4 | Very High | 6–12 months | Critical |
| Fiber cement board | 1.0–1.5 | High | 14–20 months | High |
| Cured concrete | 0.6–0.9 | Moderate | 18–24 months | Moderate |
Three Installation Flaws That Guarantee X-Cracks
The first flaw is rigid adhesive bonding without movement accommodation. Most installers use polyurethane or epoxy adhesive to glue moldings directly to the substrate with no provisions for expansion. When a 4-meter cornice is glued edge-to-edge along its entire length and the substrate expands, the molding cannot move, so tensile stress builds. A flexible adhesive (elasticity above 50%) can absorb some movement, but rigid adhesives fail instantly when their strain limit is exceeded.
The second flaw is continuous mechanical anchoring without staggering or load distribution. Anchors (typically plastic or steel fasteners every 15–20cm) are placed in lines parallel to the molding edge. When the substrate moves, all anchors pull simultaneously, creating a uniform stress field. This stress concentrates at the free ends and at any geometry change (corner, profile step). Staggered or offset anchoring distributes loads more evenly and allows micro-movement.
The third flaw is omitting expansion joints at corners and intersections. Professional facade ornaments installations include a 3–5mm gap at 90-degree corners, filled with flexible sealant. Installers skip this because it looks like a gap, but the gap is what allows the molding to move without transferring all stress to the adhesive bond. No gap means stress accumulates at the corner, and that is where X-cracks initiate.
Why 18 Months Is the Failure Timeline
Adhesive performance is time-dependent. Polyurethane and epoxy adhesives reach 80–90% of cure strength within 7 days, but the full elastic range is not achieved until 6–8 weeks at 20°C. Over the first 12 months, the cured adhesive film gradually stiffens as residual solvents and water evaporate. By month 12–15, the film is at maximum rigidity but still has some flex. At month 16–18, micro-cracking begins in the adhesive itself—not visible to the eye, but the bond no longer flexes without damage. Once the adhesive cracks, it cannot distribute stress, and the foam fails in tension.
Temperature cycling accelerates this degradation. A climate that experiences 40°C swings between summer and winter undergoes roughly 52 expansion/contraction cycles per year (weekly temperature variations plus seasonal shifts). By month 18, the molding has endured 78 stress cycles. Cyclic stress (fatigue) fails adhesives faster than static stress—this is why adhesive performance in the lab (tested at static loading) differs from field performance under thermal cycling.
EPS itself does not crack at 18 months if not under stress. The foam material is stable. The cracks are always a symptom of adhesive or anchor failure under thermal load.
How to Install EPS Moldings Without X-Cracks
Step one is to calculate substrate thermal expansion before installation. Measure or obtain the coefficient of linear expansion (CTE) for your substrate—brick averages 0.4–0.6mm/m/year, concrete 0.6–0.9mm/m/year, and fiber cement 1.0–1.5mm/m/year. For a 4-meter molding, expect 1.6–6mm of movement annually. Plan expansion joints accordingly.
Step two is to use hybrid bonding. Apply elastic adhesive (polyurethane, minimum 60% elasticity) in three parallel beads spaced 15cm apart along the back of the molding, but leave a 5–10mm continuous gap along the top and bottom edges. This allows the molding to shift slightly without tearing the entire adhesive film. Spot-apply the adhesive; do not create a continuous bead.
Step three is to implement staggered mechanical anchoring. Instead of fasteners in straight lines, offset them in a checkerboard pattern—fasteners on the top edge at positions 0, 30, 60cm, and fasteners on the bottom edge at positions 15, 45, 75cm. This distributes stress and prevents uniform pull. Space fasteners no closer than 20cm and no farther than 25cm.
Step four is to install movement joints at every corner and every 1.5–2 meters along long runs. Fill joints with polyurethane or silicone sealant rated for at least 25% movement accommodation. This typically costs $3–7 per linear meter of molding but eliminates X-crack risk. Brands like Sikaflex 252 or Dow Corning 790 withstand the required movement without failing for 20+ years.
Step five is substrate preparation. Ensure the substrate is clean, dry (below 15% moisture content), and stable before moldings are installed. Freshly poured concrete should cure 28 days. New block should be allowed to undergo its initial moisture expansion before molding installation. Damp substrates expand differently than dry ones, creating additional stress after the foam is already bonded.
Material Choices That Reduce X-Crack Risk
Higher-density EPS (28–32 kg/m³) has better dimensional stability and compressive strength than low-density foam (15–18 kg/m³). Rigidity increases, which reduces deflection under load, but this does not solve thermal cycling—it only shifts the failure mode. You cannot stiffen your way out of thermal stress; you must accommodate movement.
Polystyrene with fiberglass reinforcement (sometimes called reinforced EPS or REPS) has slightly lower CTE than virgin EPS, but the difference is negligible and cost increases 20–30%. The real gain is from installation technique, not material upgrades.
Choose molding profiles with lower aspect ratios—shorter, stockier profiles bend less under substrate movement than tall, thin profiles. A 150mm-tall crown molding is more susceptible to X-cracking than an 80mm profile, all else equal. Wide, shallow cornices are more stable than deep, narrow ones.
Verify that any decorative window sills or other elements are rated for movement-accommodation adhesives. Some products ship with rigid epoxy and do not accept flexible polyurethane as a substitute. Confirm the manufacturer’s installation guidance explicitly addresses thermal expansion.
Inspection and Early Warning Signs
At month 6–9, inspect moldings for hairline separation at corners where sealant meets foam—this indicates movement is occurring and adhesive is beginning to creep. At month 12–15, look for crazing (fine surface cracking in a web pattern) in the paint or coating, which signals stress concentration in the foam. By month 16, small X-cracks may be visible. Early detection allows you to inject flexible sealant into forming cracks and halt propagation before failure is structural.
Photograph moldings at installation and at 6, 12, and 18-month intervals. Document any changes in sealant condition, adhesive squeeze-out separation, or crack formation. This documentation is critical for warranty claims if the installer failed to follow proper technique.
Cost and Timeline Summary
Proper installation adds 8–15% to labor costs—roughly $40–80 per linear meter depending on region and profile complexity. Preventing X-cracks costs less than half the price of removing and replacing failed moldings (typically $200–400 per linear meter). Material costs for additional expansion sealant, flexible adhesive, and staggered anchoring are minimal (under $5 per linear meter). The financial case for prevention is absolute: spend $50–100 per meter now, or spend $300 per meter replacing it in year 3.
Installation timeline is not affected—hybrid bonding, staggered anchors, and movement joints do not require extra time once the crew understands the technique. Training is the only overhead, and this is a one-time cost.
Why Contractors Skip These Steps
Field experience shows most installers view expansion joints and staggered anchoring as unnecessary refinements because they have not encountered X-crack failures in their own work—or because failures appear years after the job is complete and the installer is no longer accountable. The 18-month timeline means warranty claims often fall outside standard 1-year or 2-year coverage. Second, hybrid bonding techniques require familiarity with material properties and slightly more planning than standard adhesive bonding. Third, movement joints are visible and some homeowners perceive them as gaps or defects rather than protective design features, creating sales resistance.
Overcoming these barriers requires education—understanding that thermal stress is inevitable on any facade, and that accommodating it is non-negotiable engineering, not optional luxury.