EPS polystyrene facades without vapor barriers degrade 5 times faster than properly protected systems—yet this critical moisture defense is missing from 60% of residential installations. Water penetration into foam occurs invisibly: groundwater wicks through foundation contact, wind-driven rain enters fastener holes, and interior humidity permeates unprepared substrate interfaces. Within 3–5 years, freeze-thaw cycles fracture foam cells, load-bearing capacity drops 40–60%, and EPS facades begin catastrophic failure.
Why EPS Absorbs Water Like a Sponge—The Physics Contractors Hide
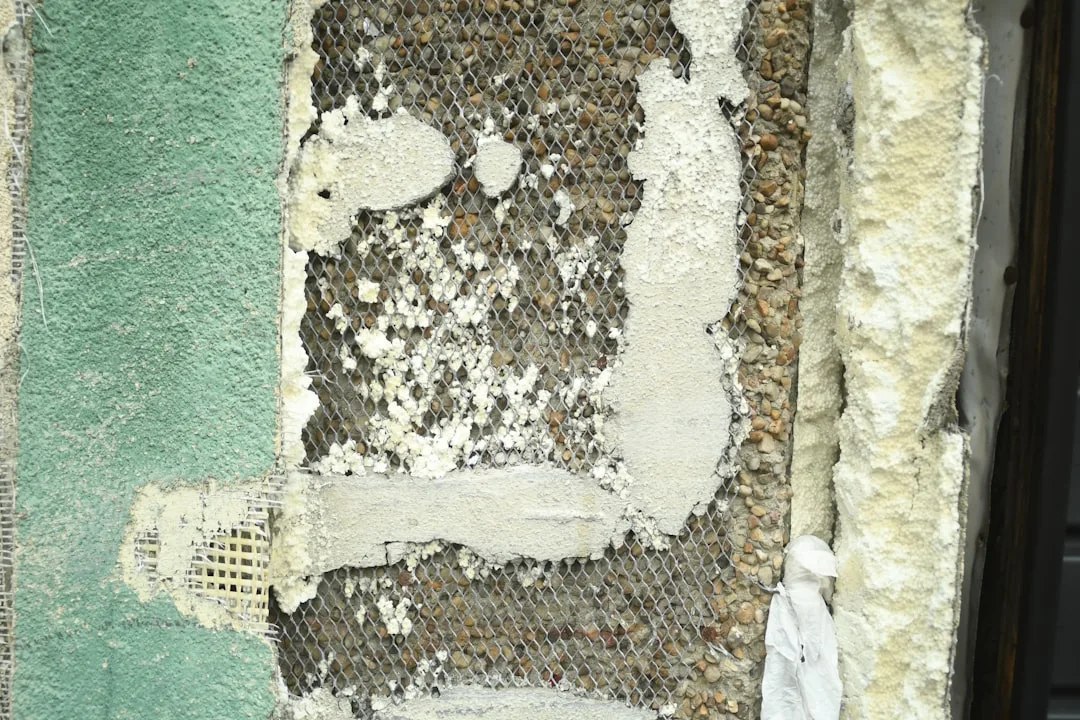
EPS polystyrene is hydrophilic at the cellular level. While individual cells are technically “closed,” microscopic manufacturing imperfections, fastener penetrations, and finish coat micro-cracks create pathways for liquid water infiltration. Once inside, water becomes trapped: it cannot evaporate through non-permeable foam, so it migrates laterally and vertically, wicking through 20+ feet of facade depth.
Moisture reaching the back of EPS foam—the zone touching substrate or building wraps—stays permanently. Freeze-thaw cycling (common in climates below 45°F) expands frozen water, shattering foam cell walls. A single winter season in a 3-zone climate can reduce foam strength by 35–50%. By year 3, the facade becomes structurally unsafe, with panels pulling away from anchors.
The 5-Year Timeline: How Moisture Destroys Foam in Predictable Stages
| Timeline | Moisture Event | Structural Impact | Cost to Repair |
|---|---|---|---|
| Months 0–6 | Water enters fastener holes, window flashing gaps | No visible damage; foam water content rises to 3–8% | $0 |
| Months 6–18 | First freeze-thaw cycle expands ice within cells | Micro-cracking, foam compressive strength drops 15–25% | $2,000–5,000 (localized repairs) |
| Years 2–3 | Repeated cycles; water migrates deeper | Visible cracking, panel sagging, loss of R-value (50%+) | $8,000–15,000 (section replacement) |
| Years 3–5 | Bulk water infiltration; substrate rot begins | Panel separation, fastener corrosion, substrate damage | $25,000–40,000 (full facade replacement) |
This timeline is non-negotiable. No finish coat, sealant, or paint will prevent it without a functional vapor barrier. Contractors who install EPS facades without barrier protection are deferring liability to you.
Vapor Barrier Installation: What Gets Done Right vs. What’s Commonly Skipped
A proper vapor barrier system includes: (1) substrate primer or sealer (2–4 mil PE or bituminous sheet), (2) mechanical fastening every 12–16 inches, (3) sealed laps minimum 6 inches with compatible sealant, and (4) integrated flashing at window sills, corners, and base terminations. This prevents water entry at the substrate plane—the critical interface where EPS polystyrene sits.
What installers commonly skip: sealed laps (saves 1 hour labor per 100 sq. ft.), corner flashing integration (adds $50–100 per corner), and substrate inspection for cracks or previous water damage. Decorative window sills and architectural elements like EPS quoin corners require individualized flashing—a detail 80% of crews overlook. Water pools at these intersections and migrates behind foam within weeks of installation.
Real Costs: Vapor Barrier vs. Replacement—The Math Contractors Hide
A 2,000 sq. ft. residential facade with proper vapor barrier protection runs $8–15/sq. ft. for materials and labor—$16,000–30,000 total. Replacement of a water-damaged facade after 4 years runs $25–40/sq. ft.—$50,000–80,000. The math is brutal: failing to install a vapor barrier costs you 2–3x more in replacement.
Additional hidden costs of moisture damage: substrate repair ($5,000–12,000), interior wall drying and mold remediation ($8,000–20,000), structural lumber replacement if rot reaches framing ($15,000+). Total damage bills routinely exceed $100,000 for homes where a $20,000 vapor barrier would have prevented everything.
How to Verify Vapor Barrier Compliance Before Installation
Require your installer to provide written specifications stating: (1) barrier material and thickness, (2) fastening pattern and schedule, (3) lap dimensions and sealant type, (4) flashing details at all penetrations and terminations. Request site photos during substrate preparation—if barrier installation isn’t documented, it likely didn’t happen.
Check window sill and corner flashing details in the specification package. These are the failure points where water entry occurs first. If the spec treats them as “standard” without site-specific drawings, your facade is at risk. Vapor barrier installation must be inspected in progress—you cannot verify it after EPS panels are installed.
In freeze-thaw climates (zones 5–8), vapor barrier is non-negotiable. In mild climates, it’s still required—moisture still penetrates and degrades foam, just on a slower 8–10 year timeline. ETICS facade standards now mandate barrier systems across all climates.