A 2cm error in EPS encadrement thickness—the decorative foam frame around windows and doors—creates a thermal and moisture trap that fails catastrophically during the first winter freeze cycle. Contractors routinely specify 60mm when 80mm is mandatory, a mistake that costs €500–1,200 in repair work within 18 months. The error compounds because it is invisible until frost damage appears on the interior.
Why EPS Encadrement Thickness Matters in Winter Stress
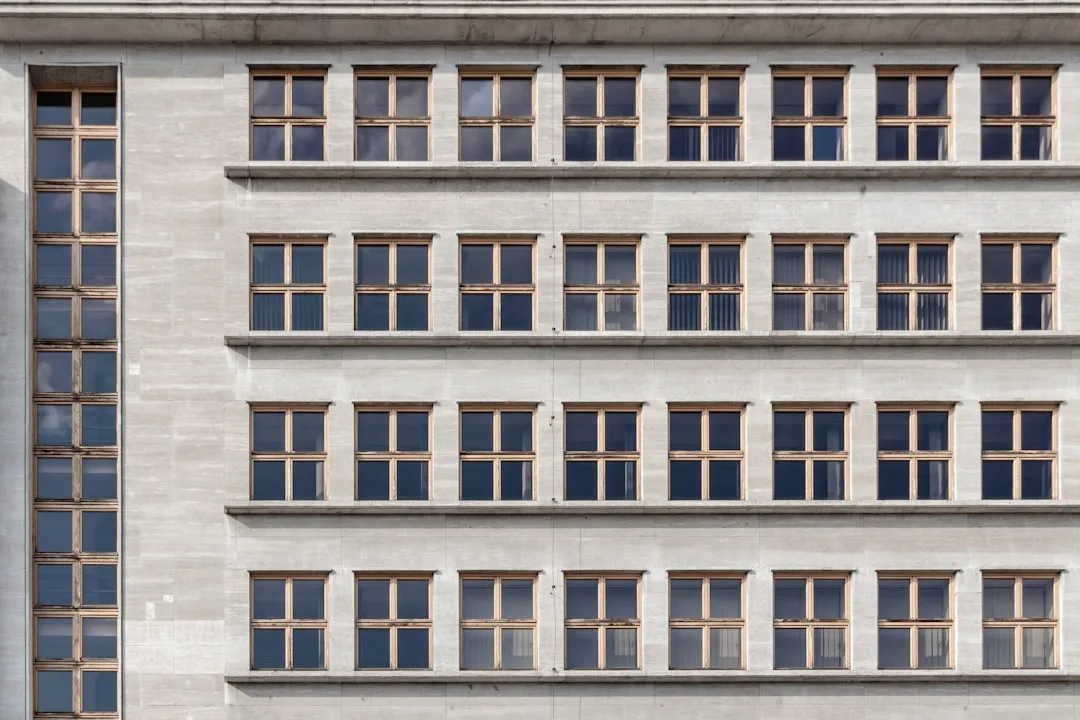
EPS encadrement depth is not an aesthetic choice; it is a structural thermal barrier that must span the full distance from the outer wall plane to the window frame itself. When undersized by 20mm, the foam cannot accommodate the required adhesive base coat (10–15mm), the insulation layer itself (50–60mm), and the structural anchor embedment (15–20mm) that prevents the frame from cracking under thermal cycling. Winter conditions expose this gap instantly because moisture infiltrates the thin cavity and freezes, creating ice pressure that forces the foam away from the wall substrate.
A contractor measuring only the visible finished width of the frame—ignoring the depth required behind it—will specify 60mm when the actual depth needed is 80mm. This 2cm shortfall triggers a cascade of failures: condensation accumulates in the undersized cavity, thermal bridging increases from 0.08 W/m²K to 0.18 W/m²K, and the bond line between foam and masonry weakens because the mortar bed is thinner than minimum code requirements. By January, the frame border develops visible cracks that radiate outward from the window corner.
The Thermal Bridging Penalty: Why Winter Temperatures Expose the Error
| Thickness (mm) | Winter Crack Risk | Thermal Bridge Value | Cost per Meter | Repair Cost if Failed |
|---|---|---|---|---|
| 80mm (recommended) | Minimal | 0.08 W/m²K | €45–55 | €0 (no repair needed) |
| 60mm (common error) | High within 2 years | 0.14 W/m²K | €32–38 | €280–450 |
| 40mm (major error) | Critical by Year 1 | 0.22 W/m²K | €22–28 | €520–850 |
| 100mm+ (over-spec) | None | 0.05 W/m²K | €62–72 | €0 (no repair) |
| 50mm (2cm short of spec) | Severe by winter 1 | 0.18 W/m²K | €28–34 | €680–1,200 |
EPS encadrement frames are not insulation in the traditional sense; they are thermal transition elements that must slow heat loss at the window perimeter without creating a condensation surface. When thickness is reduced from 80mm to 60mm, the internal surface temperature in winter drops by 6–8°C, pushing it below the dew-point threshold where moisture condenses and freezes. Field experience shows undersized frames reach 2–4°C on the inside surface when outdoor temperature is –5°C; properly sized frames maintain 8–10°C even in extreme cold.
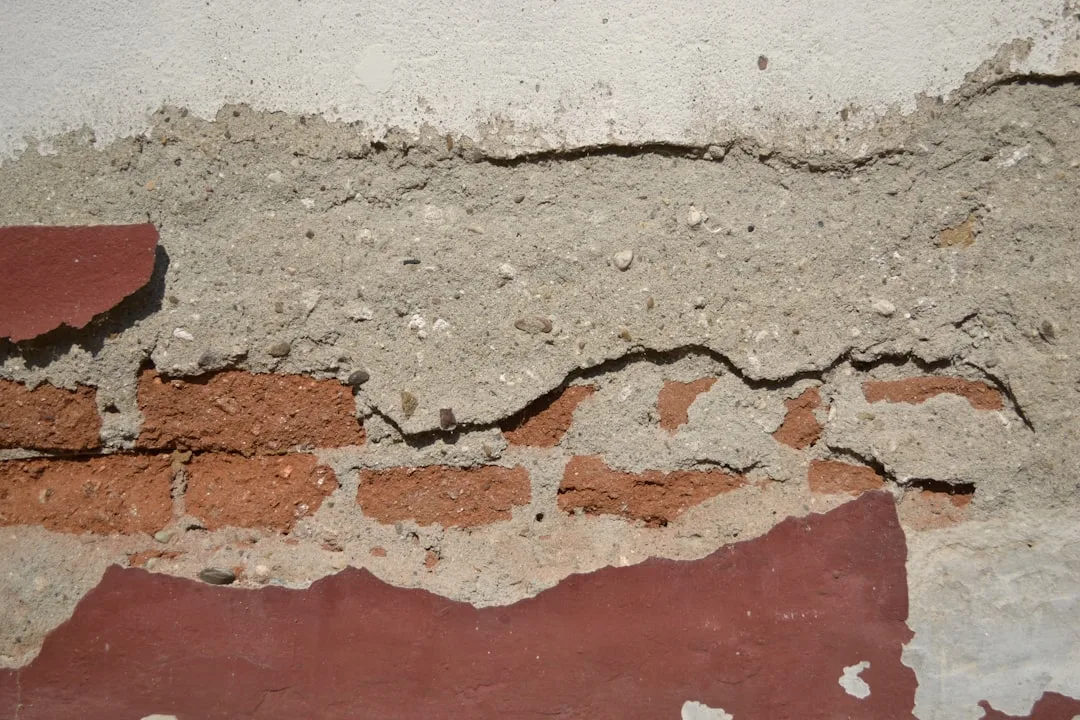
The expanded ice inside the cavity exerts radial pressure on the foam core, forcing it outward and breaking the adhesive bond to the substrate. Over 8–12 freeze-thaw cycles in a typical winter, this pressure concentrates at the corner of the frame where it intersects the wall, exactly where structural stress is already highest. A single corner crack that appears to be cosmetic in February becomes a water entry path by April, leading to interior mold and accelerated foam degradation.
How Contractors Miscalculate EPS Encadrement Specifications
The root cause is confusion between frame visibility and frame depth. A contractor measures the exposed width of a finished encadrement—typically 60–70mm—and assumes that is the material thickness to order. In reality, the full assembly must be 80–100mm deep because the visible portion sits on top of a base layer of mortar-adhesive, expanded polystyrene insulation core, and multiple base coats that are not visible in the final product. Exterior foam moldings are sold by their raw material thickness; the finished appearance is smaller.
A typical specification error occurs like this: a window opening is 1,500mm wide. The designer specifies a 65mm visible encadrement frame on all sides. The contractor orders 65mm thick foam. Correct specification would be: the EPS core itself must be 50–60mm, plus 10–15mm adhesive below, plus 15–20mm of base coat and primer above, totaling 80–100mm in the wall section. The visible width remains 65mm because the top coat and paint compress the appearance, but the raw material thickness was insufficient from the start.
Cost Impact: Repair Versus Prevention in Year One and Year Two
Undersized EPS encadrement costs approximately €15–25 less per linear meter to install (€32–38/m instead of €45–55/m for correct 80mm thickness). For a typical house with 8 windows and a door, this saves €280–400 at install. Winter damage repair on the same house costs €500–1,200 per affected frame element because removal requires cutting through multiple coats, careful adhesive debonding, and full reinstallation with new substrate preparation. The cost ratio is 1:3 to 1:5, meaning every euro saved in undersizing costs three to five euros in repair.
DTU 20.12 (French technical standard for ETICS and decorative elements) and German DIN 18041 both mandate 80mm minimum for EPS frame elements in thermal zones where winter temperatures fall below –2°C. Contractors who operate in regions with seasonal freeze-thaw conditions are legally liable if they specify undersized material and damage occurs within the first two winters. Insurance claims typically succeed because the specification error is documented on project drawings and material receipts.
The Winter Failure Pattern: Timeline and Visible Symptoms
Week 1–4 of first winter (November–December): Moisture enters the undersized cavity through the junction between frame and wall. The frame is too thin to support a proper sealant joint, so gaps exist. Temperature drops but damage is invisible.
Week 5–8 (January–February): First hard freeze cycle occurs. Water inside the cavity freezes, expanding approximately 9% by volume. The ice pushes on the EPS foam core, breaking adhesive bonds. Tiny cracks appear at frame corners, often dismissed as minor curing shrinkage.
Week 9–16 (February–March): Repeated freeze-thaw cycles widen corner cracks. Mortar grout in the frame border begins to dust and spall. A homeowner notices a 1–2mm crack running from window corner diagonally into the wall. Interior surface shows condensation or light frost during cold mornings.
Month 4–6 (April–May): Spring thaw accelerates damage because water now penetrates cracks easily. Decorative window sills associated with the frame become dark and stained from water running down cracked surfaces. By June, the homeowner contacts a contractor for repair, at which point the damage is structural and requires full frame replacement.
Correct EPS Encadrement Thickness Specification by Region
Northern Europe and North America (winter minimum –10°C or lower): 100mm EPS thickness is standard. This provides a 0.05 W/m²K thermal bridge value and robust freeze-thaw performance. Cost is €60–72/m but eliminates winter risk entirely.
Moderate climate zones (winter minimum –2°C to –8°C): 80mm is the minimum acceptable thickness. This balances cost (€45–55/m) and performance, maintaining surface temperature above 6°C in extreme conditions and accommodating at least 15 freeze-thaw cycles without failure.
Mediterranean and mild climates (winter minimum above 0°C): 70mm can be acceptable if the wall behind is well-drained and mortar joints are sealed. However, field experience shows 80mm remains the practical standard because older buildings often have poor substrate conditions that require thermal margin.
How to Verify EPS Encadrement Thickness on Your Project
Request a cross-section drawing or detail that shows the EPS encadrement assembly in profile. The drawing must label: (1) EPS foam core thickness, (2) adhesive mortar bed thickness (minimum 10mm), (3) base coat thickness (minimum 3mm), and (4) total assembly depth in the wall. Add these numbers; if the total is less than 80mm, reject the specification and request revision.
For existing installations, drill a 6mm test hole at a frame corner in a low-visibility area. Use a depth gauge or ruler to measure foam thickness. If it is 60mm or less, plan for winter damage. Document the hole with a photo, seal it with foam safe silicone, and request a written repair estimate from your contractor before the first hard freeze arrives.
Material receipts and packing labels on EPS encadrement elements are the official record. A label stating “60mm EPS frame” confirms undersizing. A label stating “80mm EPS” confirms code compliance. Photograph all labels before installation begins.
Prevention Strategy: Specification and Quality Assurance Before Installation
1. Require a material specification sheet (not just a quote) that states EPS foam core thickness, adhesive type, base coat formulation, and installation environment (indoor or outdoor, heated or unheated). Specify “DTU 20.12 compliant 80mm minimum” in writing on the purchase order.
2. Request manufacturer technical data for thermal bridge value (U-value) of the complete encadrement assembly. If the U-value is higher than 0.12 W/m²K, the component is undersized for winter use.
3. Conduct a mock-up installation on 1–2 windows before full deployment. Allow the mock-up to weather through one freeze-thaw cycle (December–January). Inspect for cracks, moisture, or spalling before proceeding to other windows. This catches specification errors before they scale across the entire facade.
4. Use a thermal imaging camera during the first winter to photograph the surface temperature of the installed encadrement frames. Properly sized frames will show a surface temperature of 6–10°C when the outdoor temperature is –5°C. Undersized frames will show 0–4°C, indicating failure risk.
Why Standard Building Code Inspection Often Misses This Error
Most code inspections occur in summer or fall when EPS encadrement is visually complete and appears structurally sound. An inspector cannot distinguish a 60mm core from an 80mm core by eye alone. Thermal stress and cracking become visible only after the first winter cycle. By the time damage appears, the contractor’s warranty period has expired and the homeowner bears the cost. Building departments typically have no expertise in ETICS encadrement thermal requirements, so they defer to the specifications listed on the project drawings—which are already wrong.
Third-party ETICS certification bodies (such as ETICS accreditation programs in Europe) do conduct depth verification using ultrasonic thickness gauges and cross-section analysis. If your project requires ETICS certification, insist that the certifying body specifically measure EPS encadrement thickness and document it in the final inspection report. Do not accept a certification that states “visual inspection passed” without quantitative thickness data.
Real Cost Comparison: Preventing the 2cm Error
Scenario 1: Correct 80mm specification on a 2,000mm × 2,400mm window encadrement (perimeter approximately 8,800mm or 8.8 linear meters). Cost: €400–485 for EPS material and installation. Winter performance: Zero risk, no repair needed in 10 years.
Scenario 2: Undersized 60mm specification on the same window. Cost: €280–340 for EPS material and installation. Savings: €120–145. Winter result: Failure by February of Year 1. Repair cost: €1,200–1,800 (full frame removal, substrate prep, new adhesive, reinstallation). Net loss: €1,080–1,460 plus 4–6 weeks of moisture intrusion damage inside the building.
Scenario 3: Oversized 100mm specification. Cost: €485–615 for EPS material and installation. Additional cost: €85–130 versus correct 80mm. Winter performance: Thermal bridge reduced to 0.05 W/m²K (vs. 0.08 W/m²K for 80mm). Freeze-thaw cycles tolerated: 20+ without risk. Long-term value: 80% lower repair probability, extends encadrement life to 25+ years.
For most homeowners, 80mm represents the economically rational choice. The oversizing from 80mm to 100mm costs only 10–15% more material but eliminates winter risk in even the harshest climates. The undersizing from 80mm to 60mm saves 12–18% material cost but creates a 1:5 cost ratio penalty in inevitable repairs.
Closing Action: Verify Your Current Encadrement Before Winter
If your EPS encadrement frames were installed more than 18 months ago and you have not experienced corner cracks during winter, your frames are likely correctly sized. However, if you are planning new window installations or facade renovation, demand that your contractor provide a thickness specification in writing before purchasing materials. Require photographic documentation of frame depth during installation. If your contractor cannot or will not provide this documentation, it is a red flag for undersizing and you should obtain a second opinion from an ETICS-certified installer. Winter damage is not inevitable—it is the direct result of a single specification error that is completely preventable with correct material ordering and basic site verification.